

Today, I’m going to be making a reliquary for a chipmunk skull that I processed and cleaned a while back. The skull itself is incredibly fragile, and I’d like to have it permanently displayed in a way that it’s not at risk of destruction.
✷
Before we get into that, let’s go over some background information on reliquaries and their purpose.
✷
Starting with the basics, a reliquary is a vessel used to house a relic that is spiritually significant. Oftentimes these relics are pieces of the bodies of saints and martyrs, though it’s not uncommon for relics to be items that the holy person might have come into contact with. A good example of the latter is a piece of wood said to have been a part of Jesus’s cross. It was/is believed that coming in contact with such relics could impart one with various kinds of blessings (usually specific to the nature of the relic itself).
✷
On the surface, reliquaries appear to be primarily Christian in nature. They were incredibly popular in the Middle Ages, and articles about reliquaries tend to focus primarily if not entirely on their Christian incarnations. That said, the veneration of relics is not exclusive to Christianity. Buddhism and Hinduism both have some examples of reliquaries (and I’m positive they’re found in other traditions as well). In Buddhism, there is a reliquary that is said to contain some of the ashes left over after Buddha’s cremation.
✷
If reliquaries are so sacred, how can I make one?
I’m well aware that any reliquary that I manage to make will pale in comparison to historical examples, but that doesn’t mean I can’t still create something beautiful. I plan to go about this making in a very intentional manner; leaving space for reverence of the skull itself and the life it represents. I’m going to light some candles, put on some music, and let the skull teach me how to make it’s reliquary.
✷
Why a chipmunk skull?
On the surface, a chipmunk skull might seem like an odd choice for veneration, but this particular one is very dear to me. Years ago, I found two chipmunks that my (at the time) indoor/outdoor cat had killed and left for me. I didn’t want their lives to go to waste, so I set about processing and cleaning their bones for a month or two. Shortly after I did this, my cat passed and the bones became a strange way for me to feel like I was still connected to him. Years later, and I’ve moved across several states as well. To me, these chipmunk bones have essentially become a symbol of the home and beloved pet I had to leave behind.
✷
For these reasons, I think that having a way to display the skull in a sacred manner would bring me great comfort. It’s been sitting in a box with some padding for quite some time, as I’ve been afraid to break it (there were originally two, and one shattered from being knocked off a low table).
✷
So let’s get on to creating!
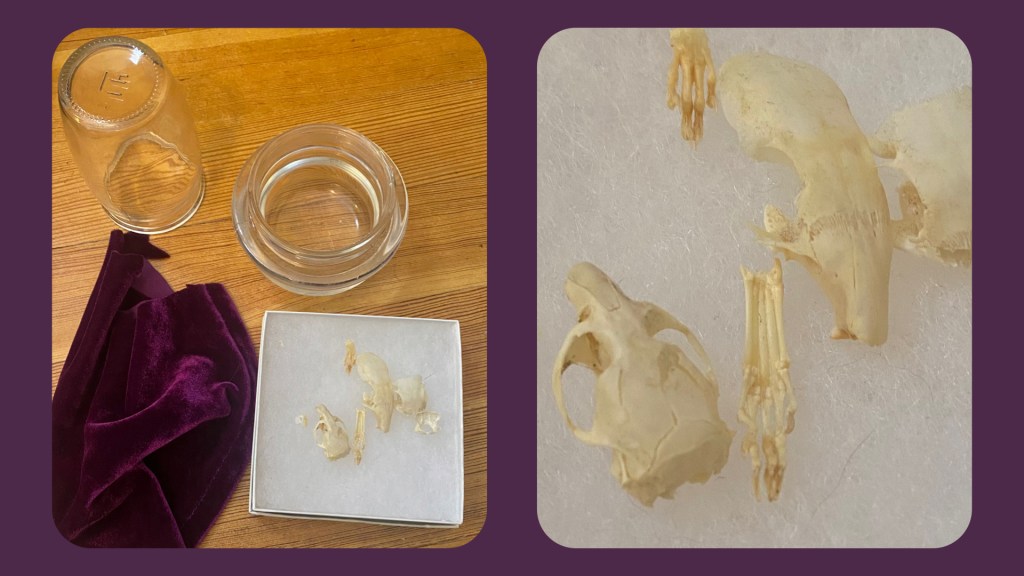
Below, you can see some of the supplies I’ve gathered for this particular craft. I ended up adding a few other elements not pictured here, but I added those as I went so I don’t have a good photo of them together.
✷
✷
For the main base of the reliquary, I chose a couple of glass items I had sitting around. The larger glass was an old candle lid, and it made a perfect base for the reliquary. I then found a glass that fit inside it perfectly, and decided to use that for the top to create something roughly resembling a cloche.
✷
I had this small box of bones I processed and cleaned myself, which housed the main subject of my reliquary. The chipmunk skull is the larger of the two pictured. The smaller one belonged to a mouse, and I might have to make another reliquary for it sometime in the future. All of these bones are super fragile, so I had to make sure I was really careful with them.
✷
Finally, I had a square of purple velvet which I would use to create a sort of pillow for the skull to sit upon. Not pictured here are the fabric scraps I used to stuff it with.
✷
✷
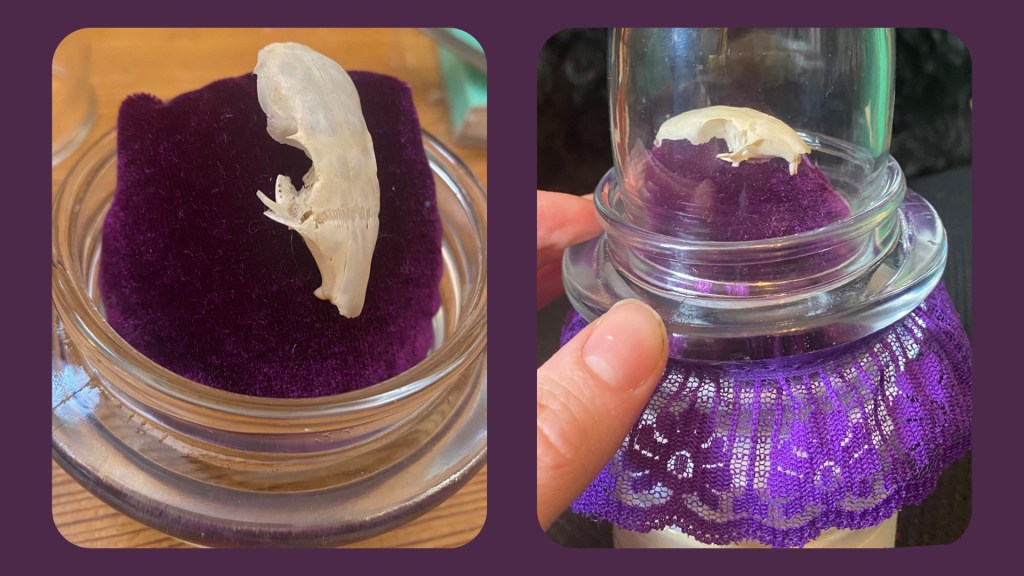
Above, you can see the small pillow I made for the skull. I attached the skull to it with the smallest dot of hot glue I could manage so that it didn’t rattle around when I moved the reliquary.
✷
I found some purple lace in with my sewing notions, and thought it would be perfect to glue around the base. It ended up being wider than the base was tall, so I ended up making another small base to elevate the reliquary and let the lace drape a little nicer. In the photo above, I’m simply balancing it on a paint container to try to get a feel for how the lace would look if it wasn’t squashed against the table.
✷

✷
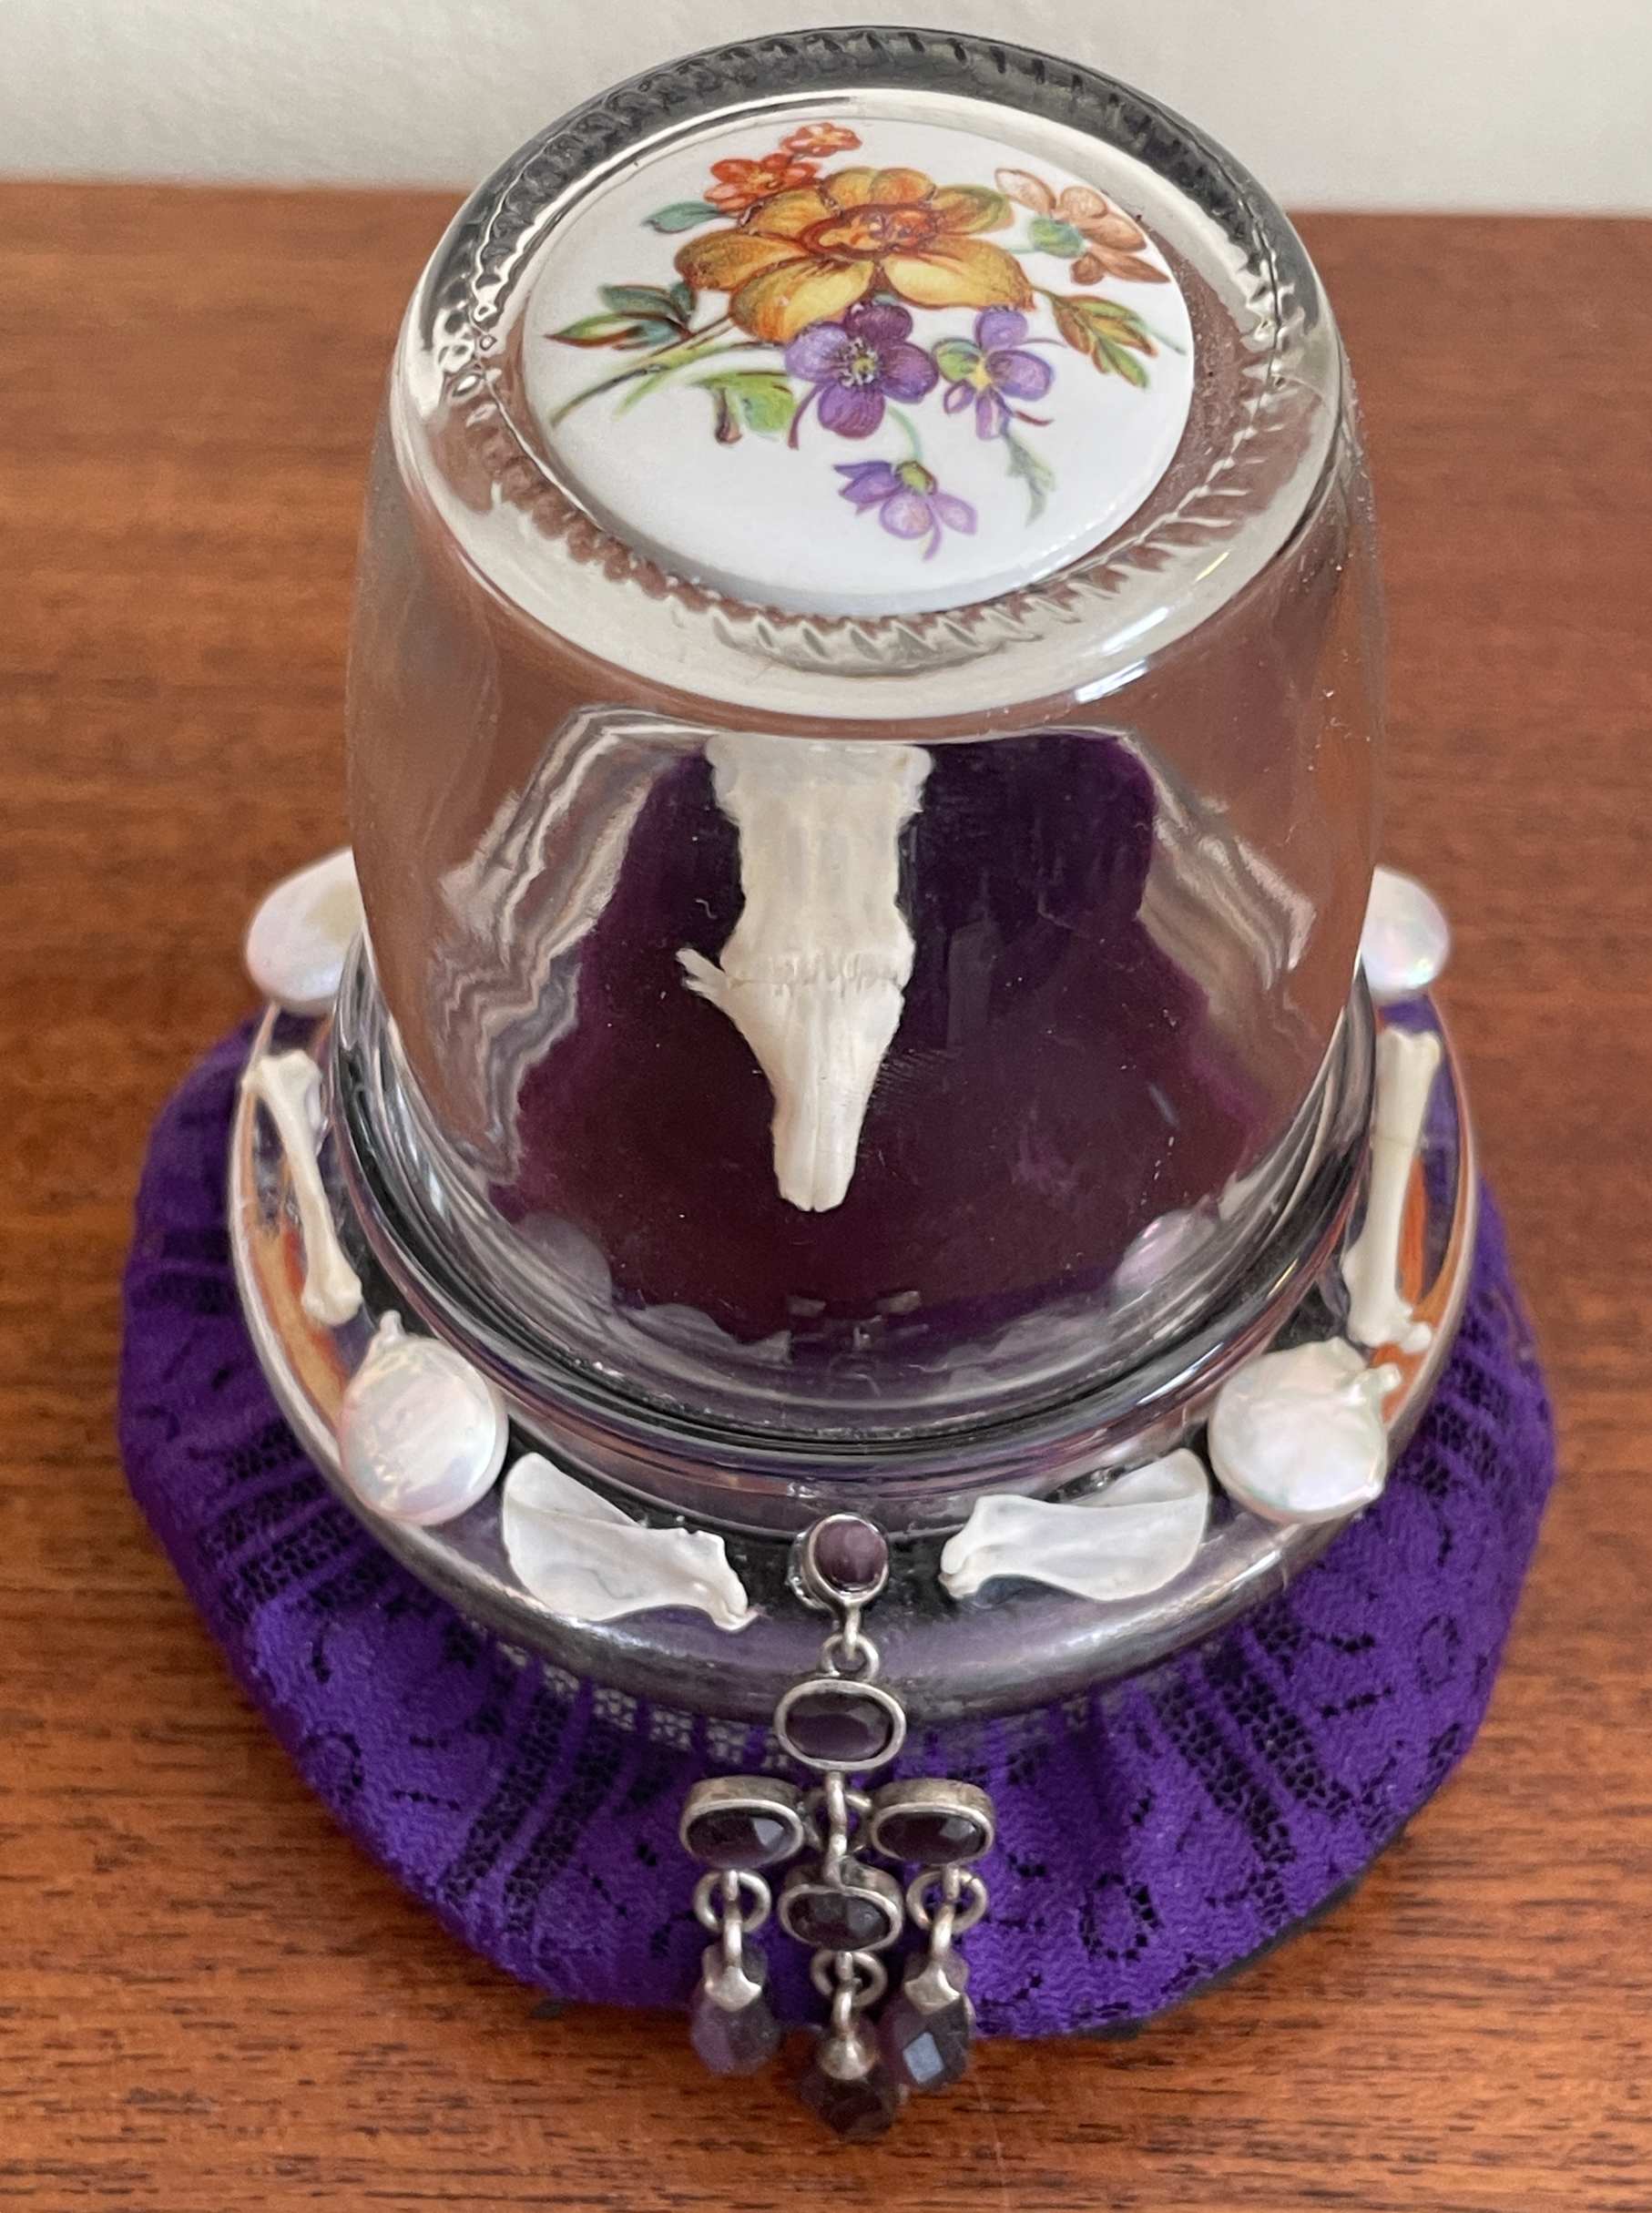
Next, it was time to add the details. This is my favorite phase of any project, to be honest. I started by gluing the round ceramic piece to the top of the reliquary. I wanted something to dress up the top, and I think this worked pretty well. In the center of the base of the reliquary, I glued an orphaned purple earring I had. Along the rim, my fiance was kind enough to let me use some of his small collection of pearls to dress it up. I really wanted the piece to feel luxurious and sacred, and I think the pearls did a pretty good job helping with that.
✷
The last things that I decided to glue to the rim (not pictured above) were a few other bones from the chipmunk that I had in a separate jar. I was inspired by reliquaries containing bones, as well as ossuaries and catacombs. Something about using bones both decoratively and reverently really struck a cord with me.
✷
It might seem macabre to the average person, but I think that there’s something quietly beautiful about all the sources I was using as inspiration. Before we get to the final reveal of my reliquary, I’d like to share a few photos of the aforementioned sources. I’m also including details in the image captions to help you do some further looking if you find yourself interested in any of these fascinating arrangements.
✷
Some Inspirations…
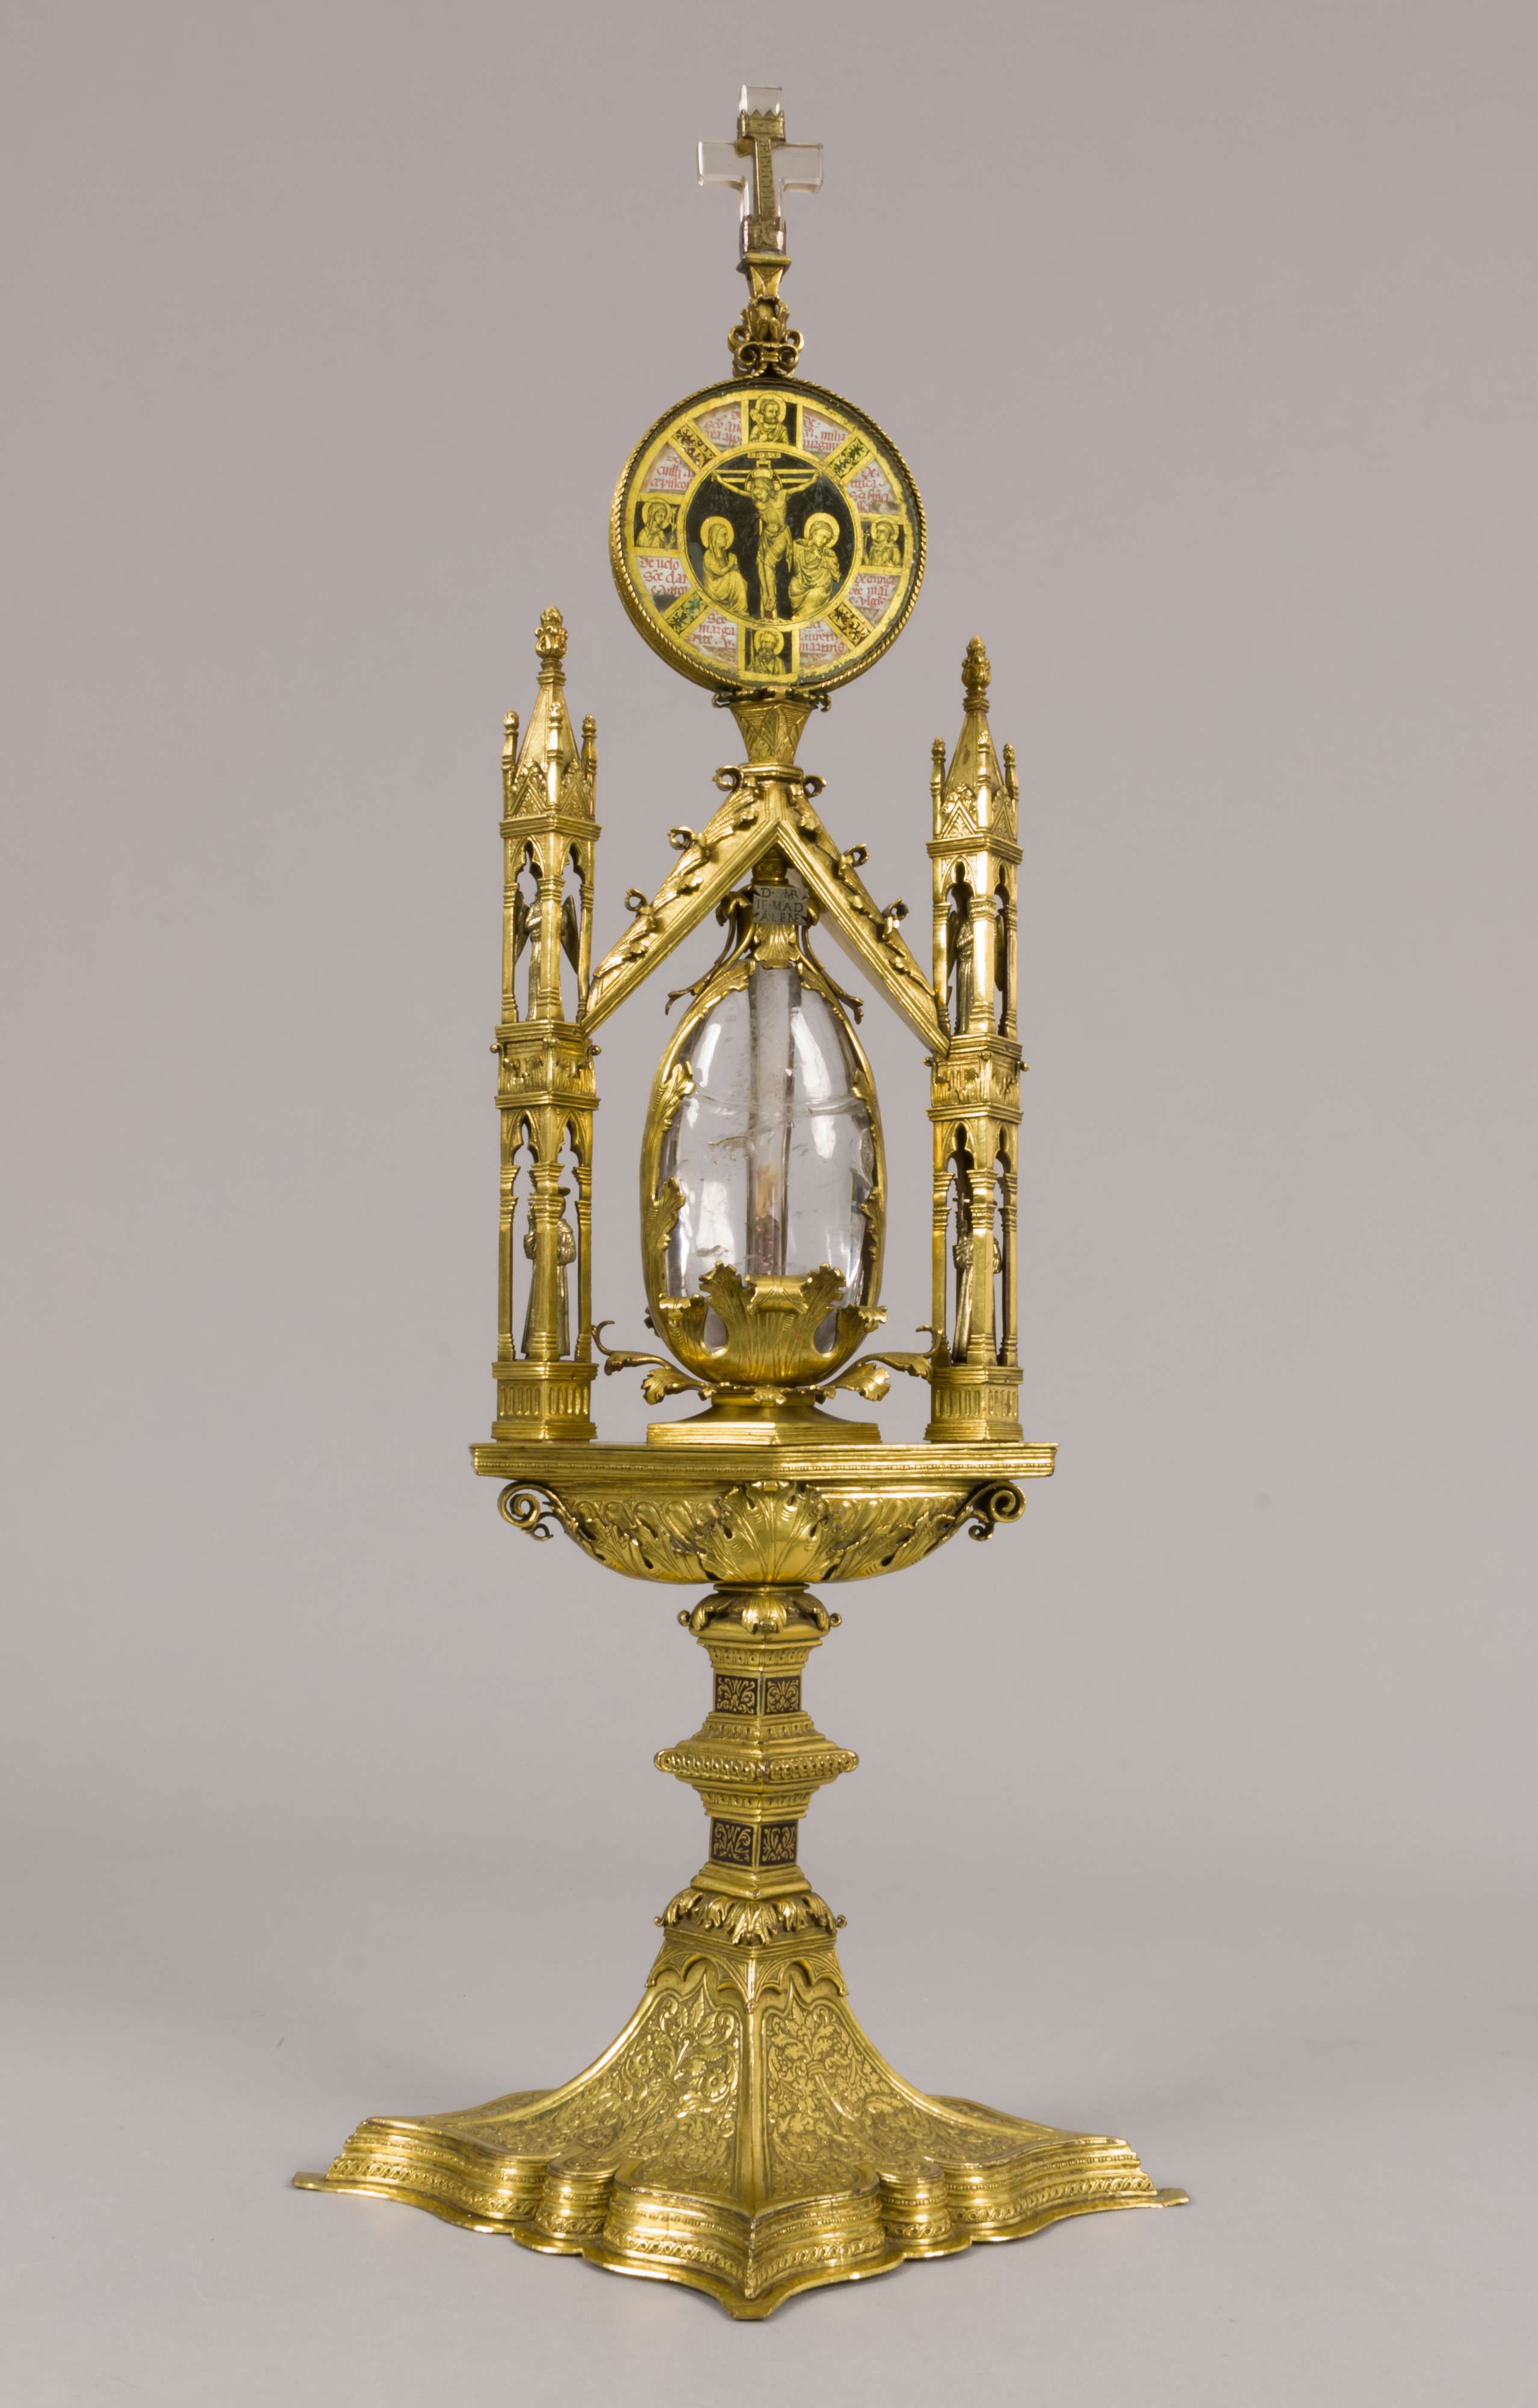
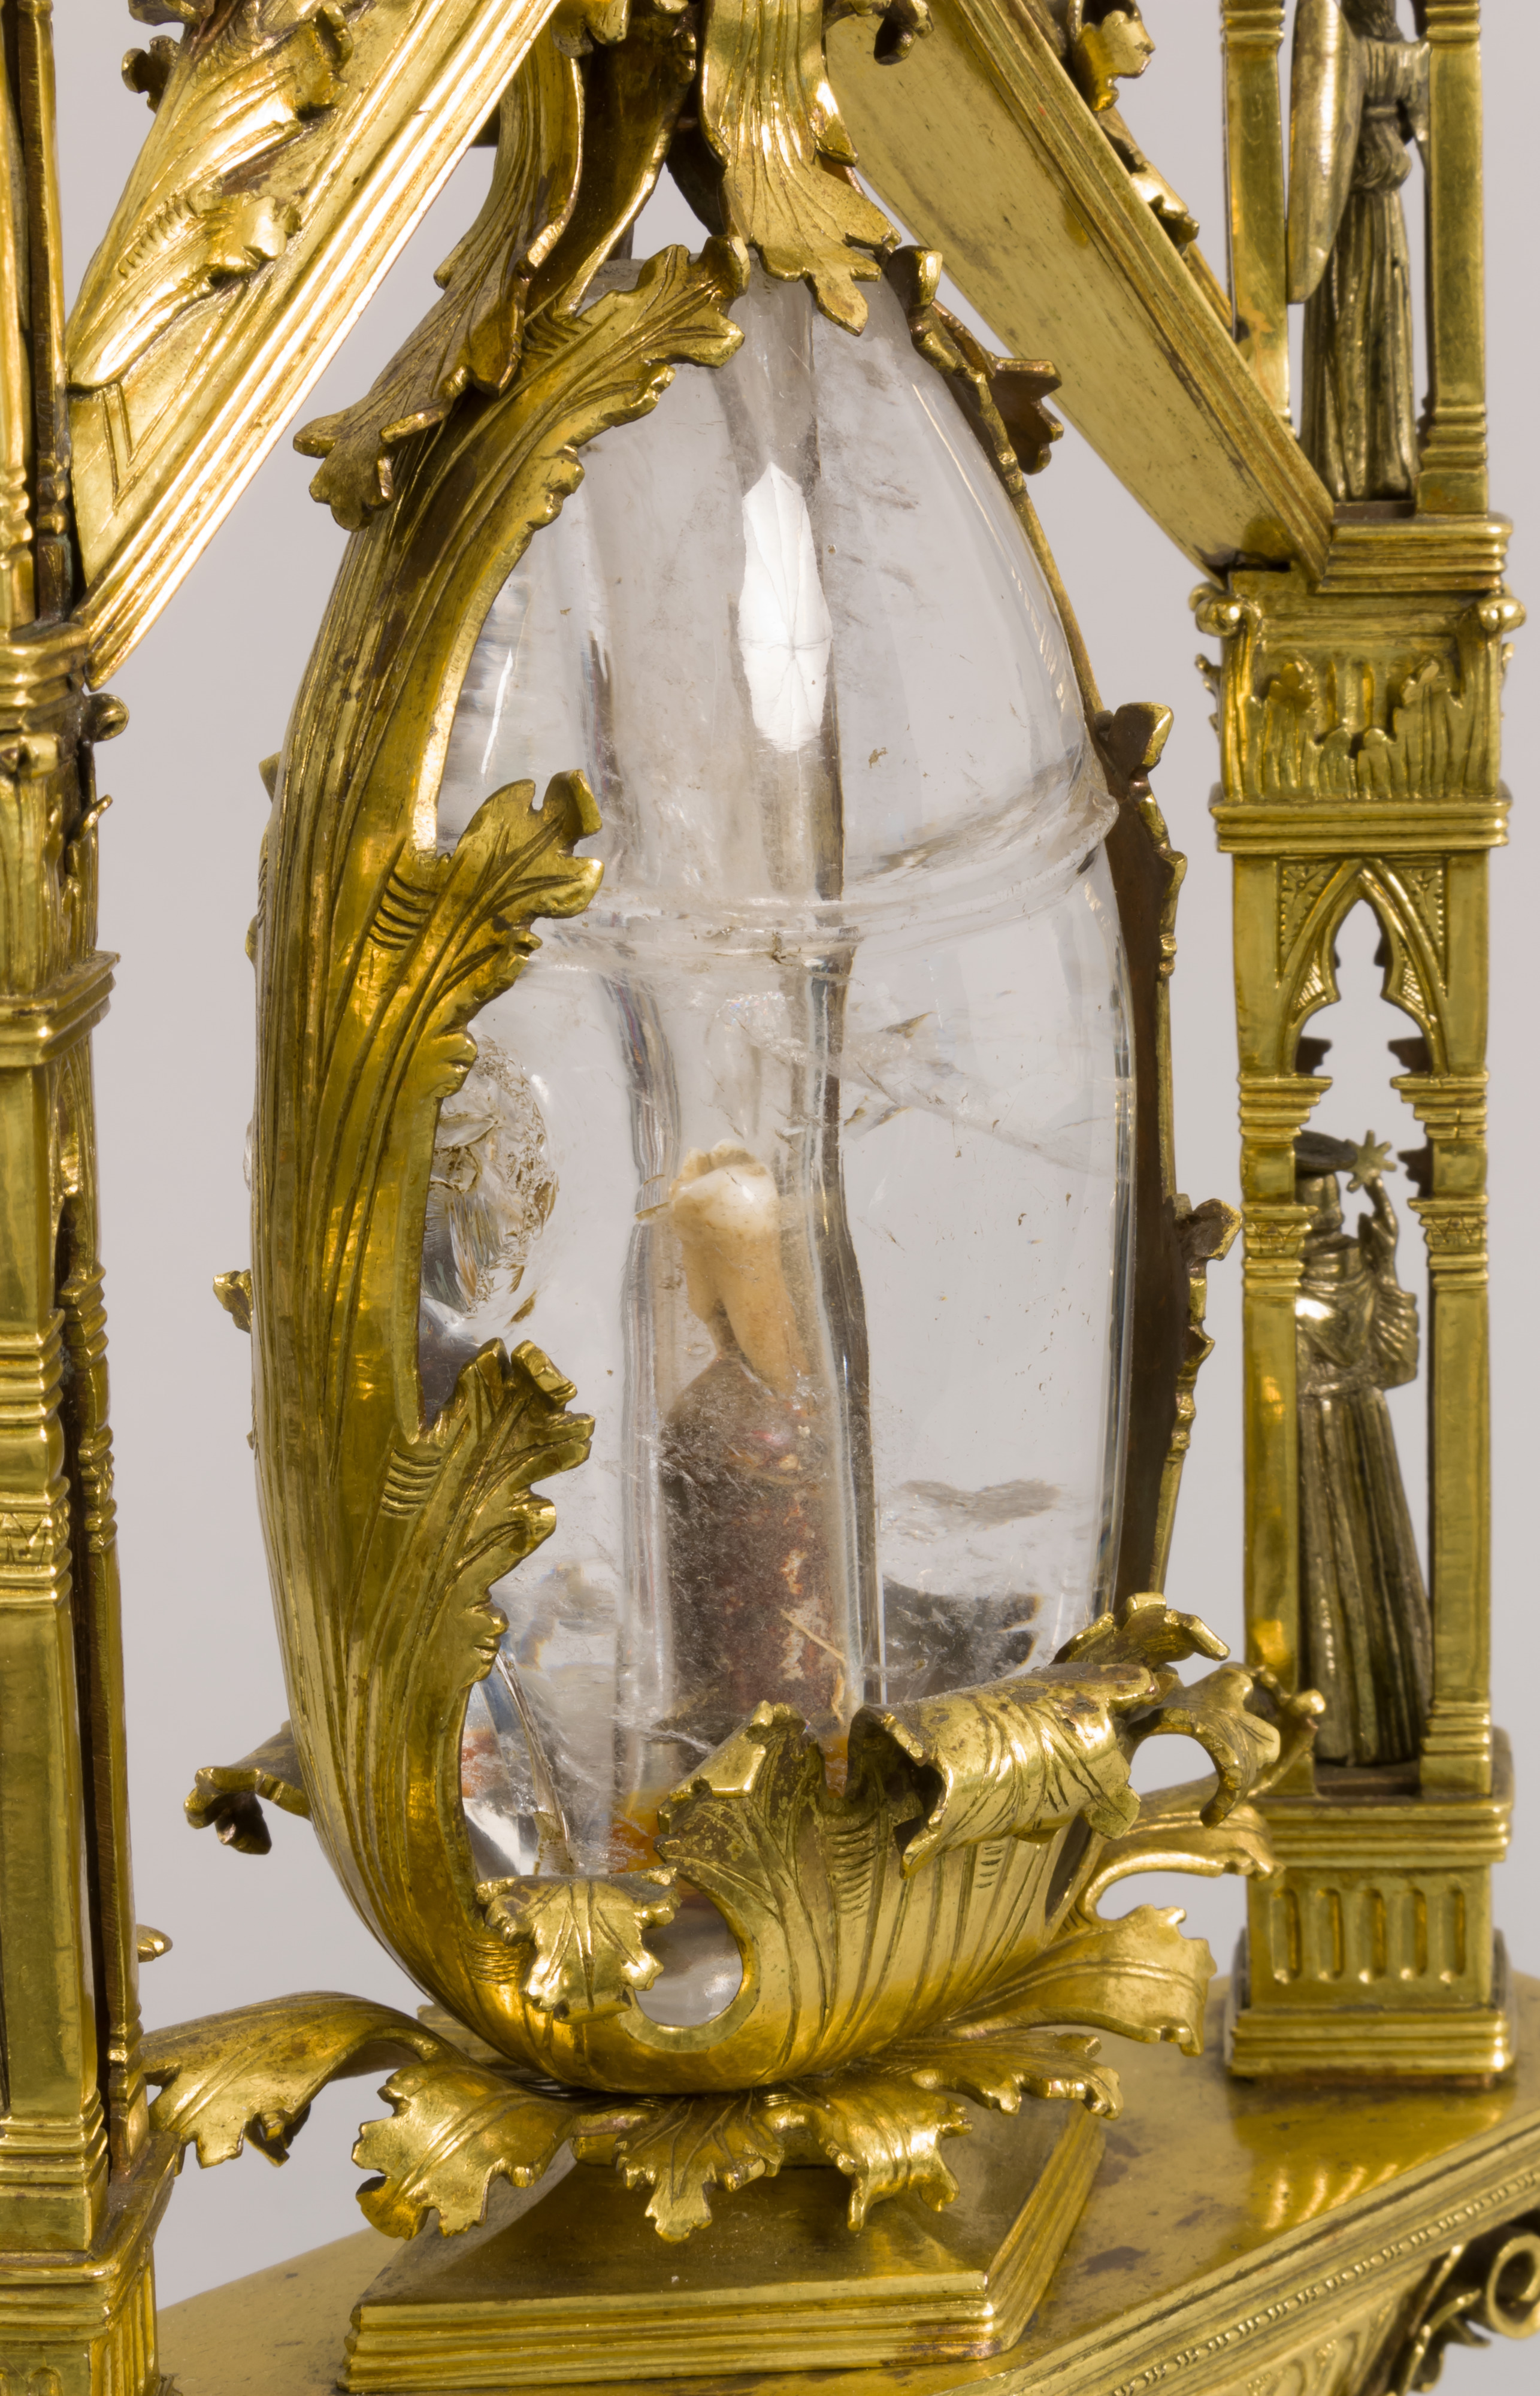
Reliquary of Mary Magdalene, photos provided through the Met’s Open Access policy.
✷
This reliquary was said to contain the tooth of Mary Magdalene (shown at the center of the object and encased in rock crystal). It was made sometime in the 14th or 15th century by Franciscan friars in Tuscany, Italy.
✷✷
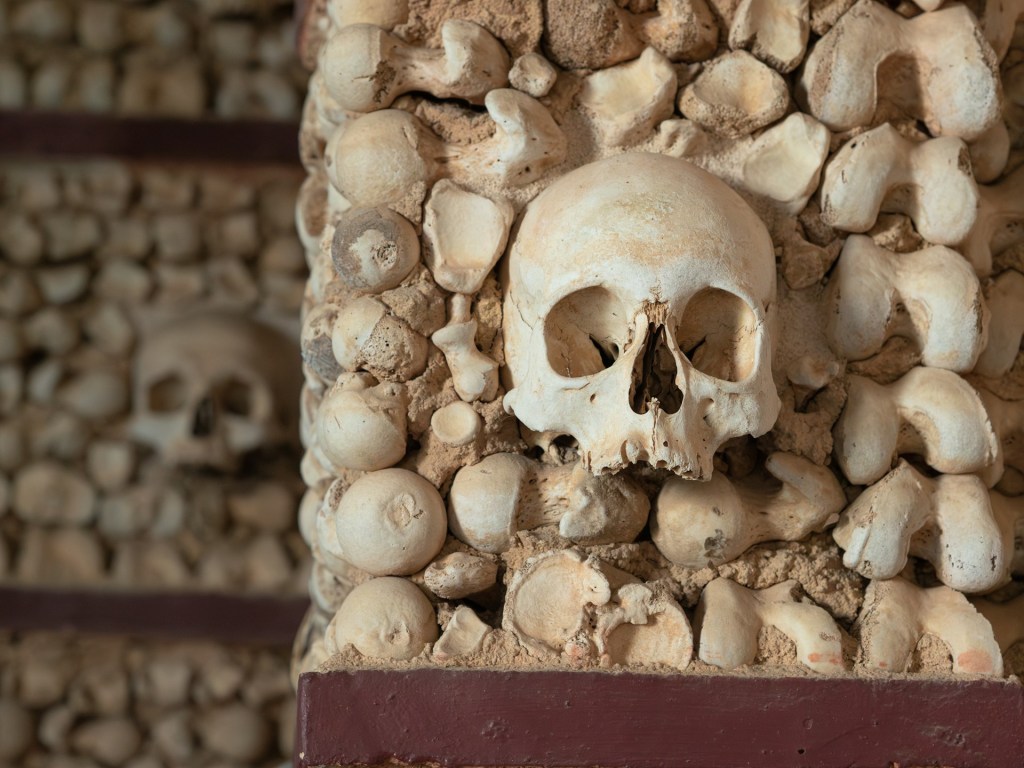
Detail photo of Capelas dos Ossos in Portugal by Robson Felicio on Unsplash.
✷
Capelas dos Ossos is a small chapel located inside of the Church of St.Francis in Évora, Portugal. It was made by Franciscan friars and finished in 1816. This picture doesn’t do the entire chapel justice, but I was trying to use royalty free images where possible. For more images and information, this article is a decent starting place.
✷✷
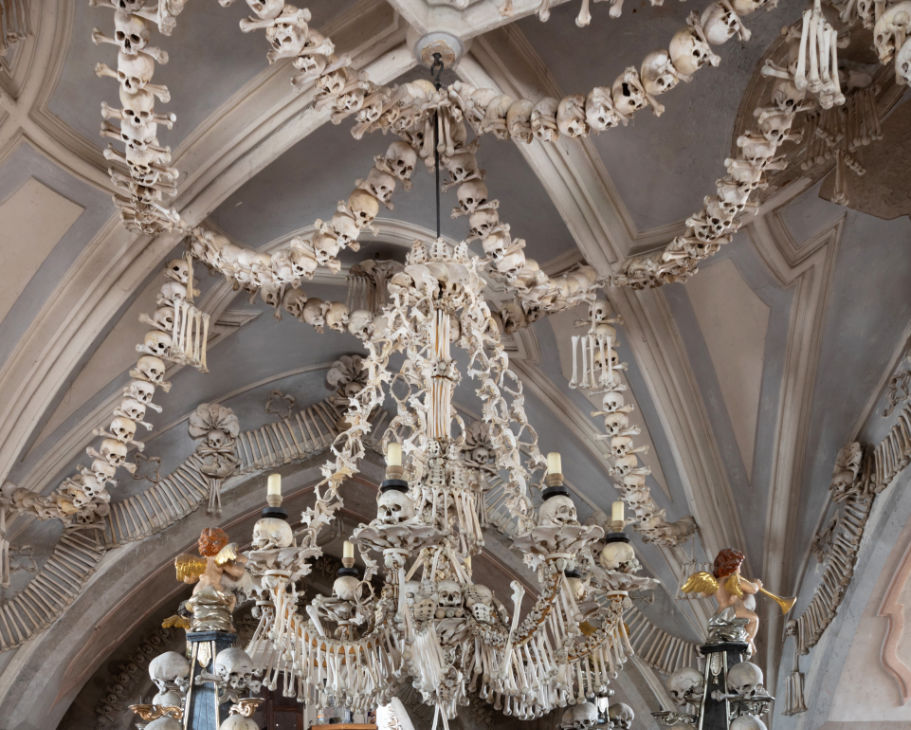
Photo of a skeletal chandelier from the website of the Sedlec Ossuary.
✷
The ossuary located in the Czech Republic, and is a Roman Catholic Chapel. The ossuary first came about after the plague, when the popularity of the chapel caused an influx of human remains. The task of arranging the bones was first given to a half-blind monk. Nearly 300 years later in 1870, a local woodcarver named Frantisek Rindt arranged the bones into the formations that they have today.
✷✷
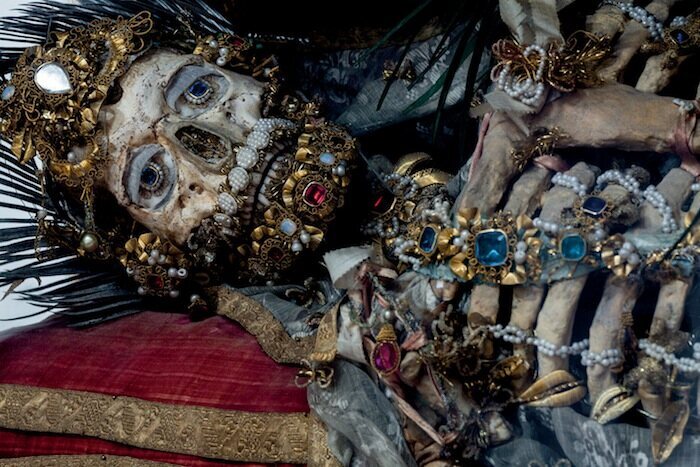

Photos of bejeweled skeletons originally found in the catacombs beneath Rome, copyright Paul Koudounaris.
✷
These skeletons were originally thought to belong to Christian martyrs, though most of their identities are unknown to us. If the topic interests you, I would highly recommend checking out Paul Koudounaris’ book, Heavenly Bodies: Cult Treasures & Spectacular Saints from the Catacombs. Koudounaris is an art historian and photographer who set about documenting the skeletons before more of them were lost to time.
✷✷
Time for The Reveal!
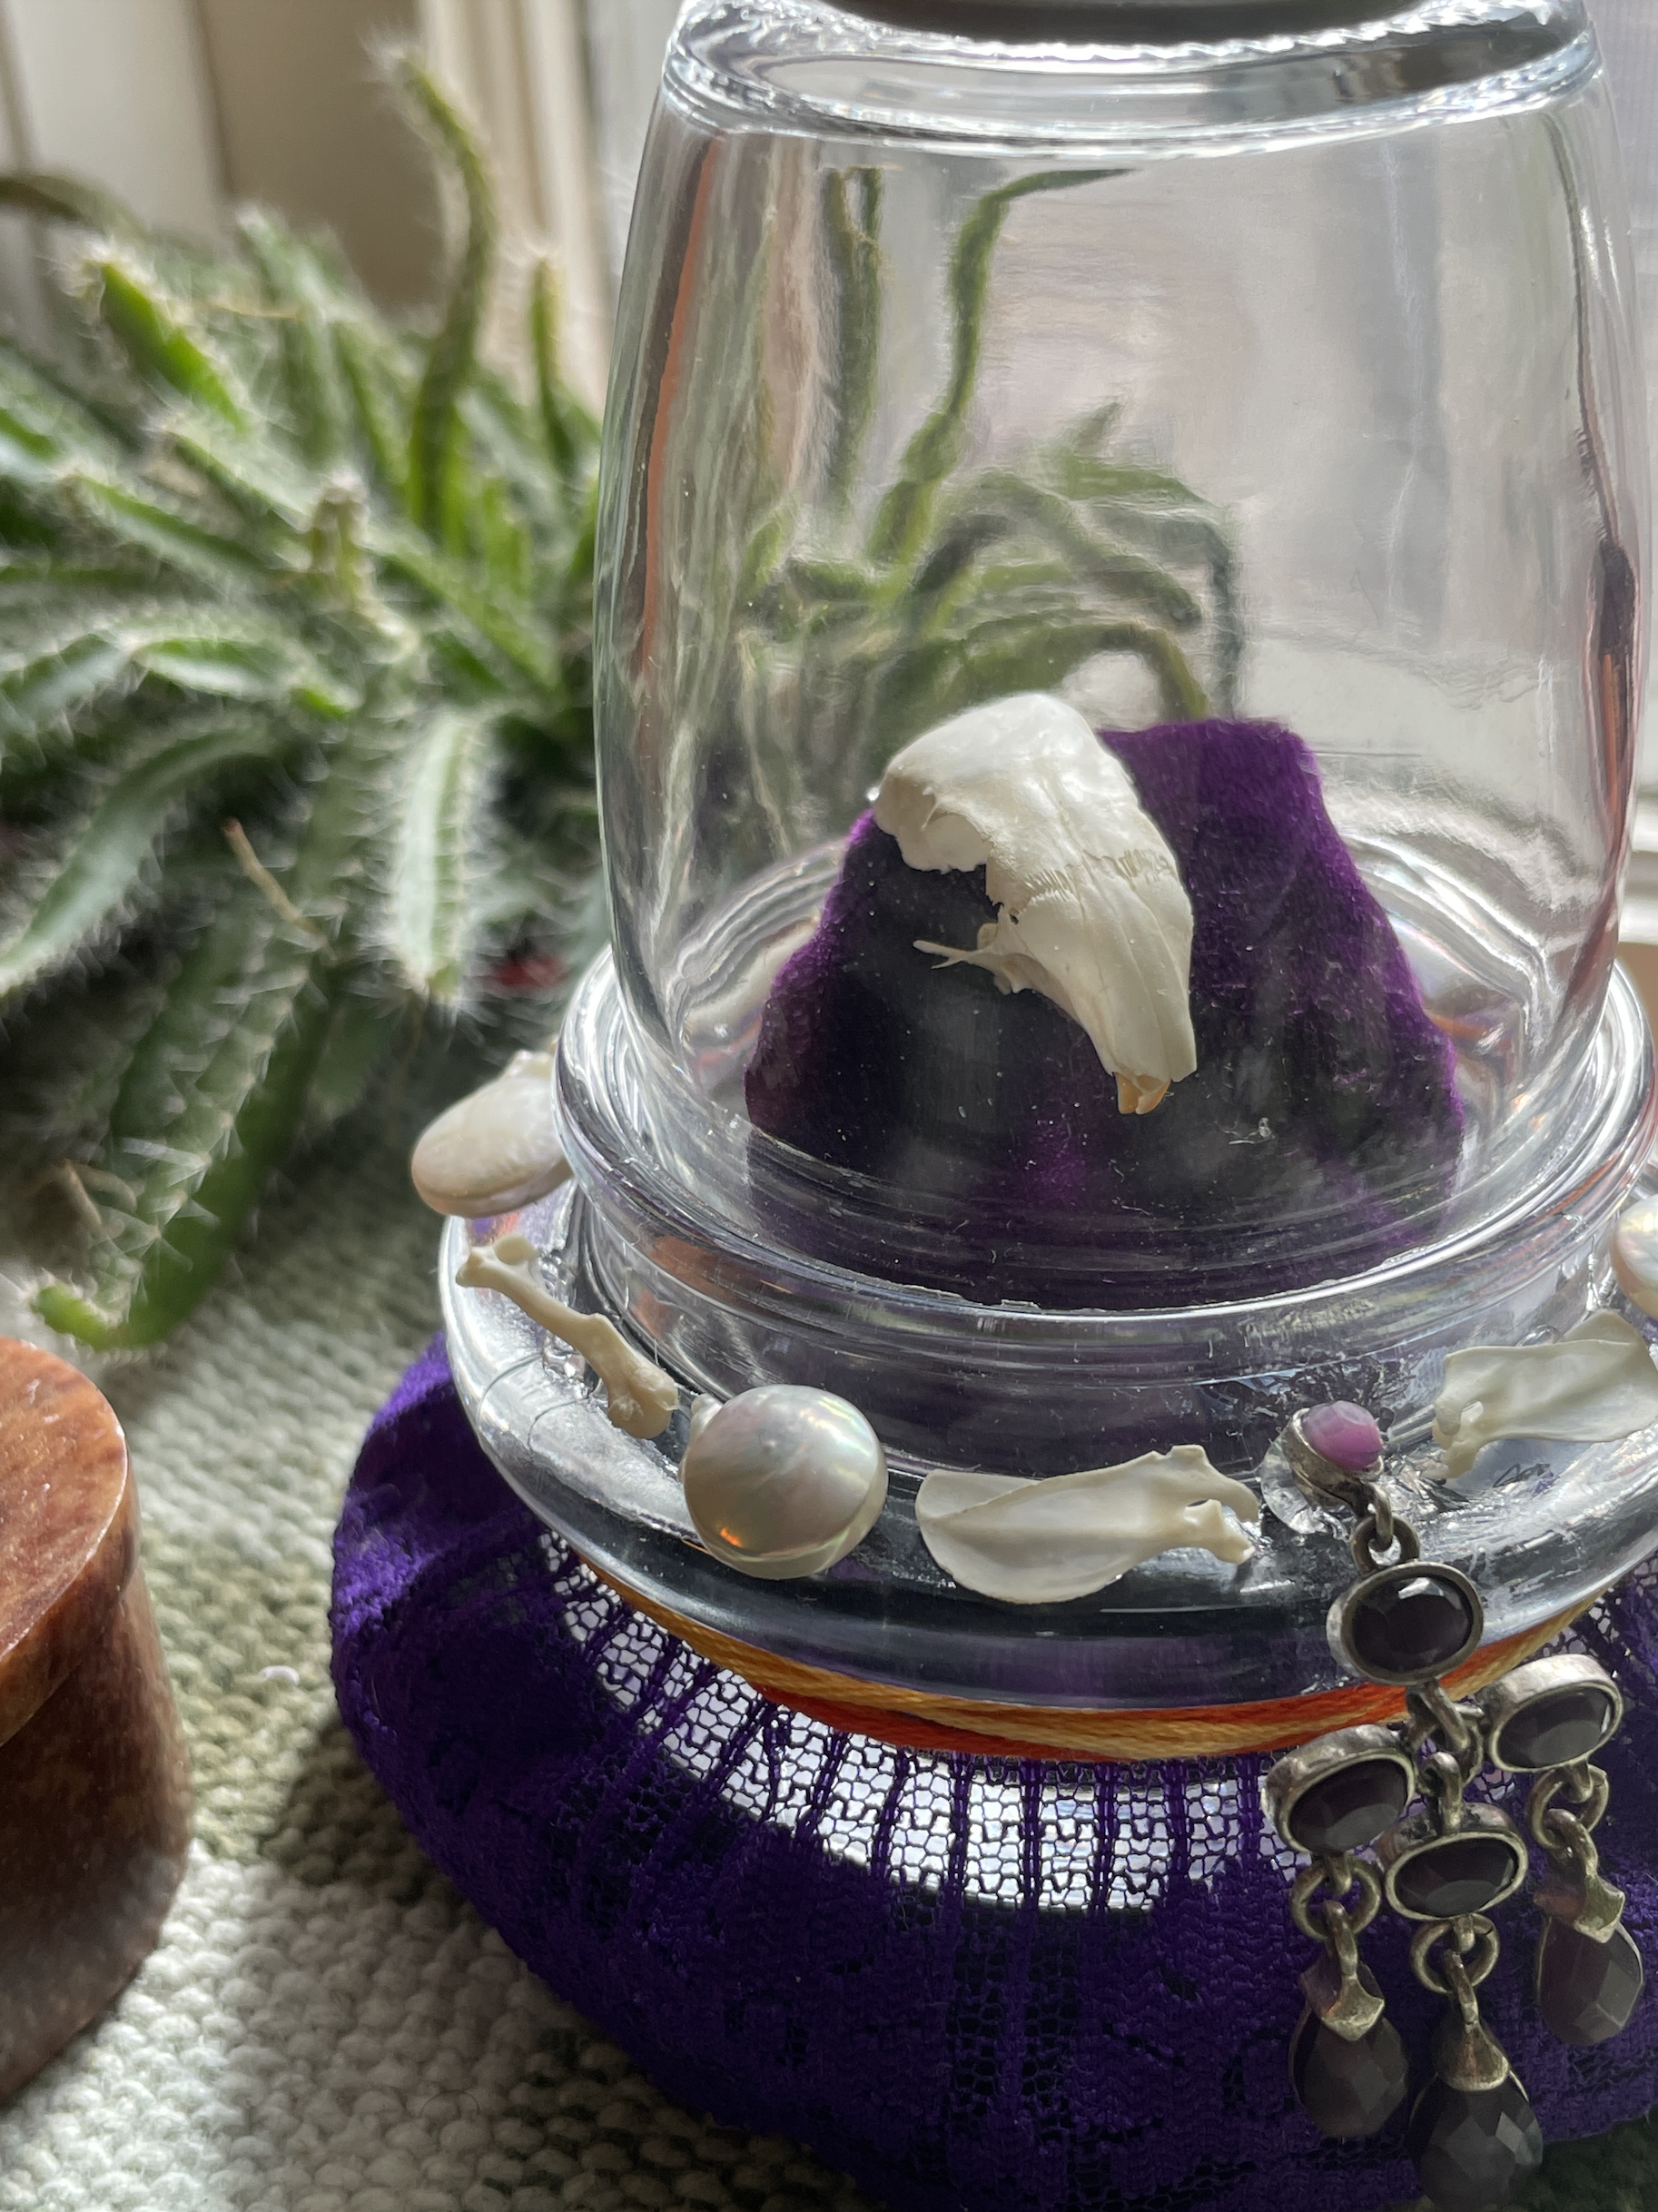
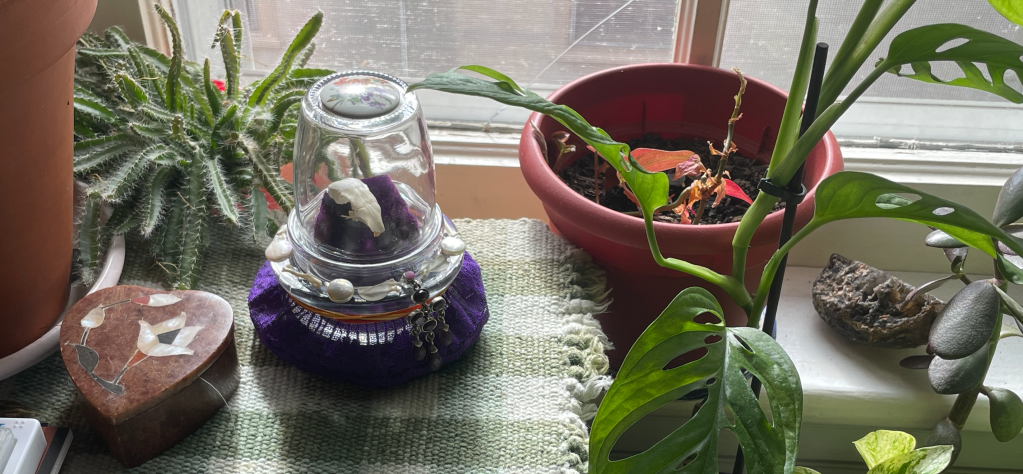
Without further adieu, here is the finished reliquary! I think the bones on the rim were the element that really tied everything together. Overall, I’m really happy with the result. It feels like I’m finally properly honoring the spirit of the chipmunk instead of stuffing it into a drawer somewhere. I’m also confident that the cloche will keep the skull protected, so I don’t have to worry about breaking it further. I enjoyed this little project, and just might have to revisit the concept again later with that mouse skull I showed earlier.
✷
✷
What do you think? Would you ever consider making a reliquary of your own? What would you put inside it if you did? I’d love to see pictures on the off chance this does inspire someone to make something!
✷

Leave a comment